Tutorial Tuesday: Princess Aurora Curls
From the dawn of time- well my time- I have loved Princess
Aurora. Even before I saw the 1959 masterpiece “Sleeping Beauty” (one of the
most under appreciate films of all time IMO) I have love Princess Aurora. As a
three year old, I fell in little girl love with everything about her- the
dress, the beauty, the Prince (yum yum) and especially THE HAIR! She had hair like me which is why
she and I had to be best friends. My obsession has only grown since the age of
three, so much that I now collect Sleeping Beauty paraphernalia (Does anyone
knows where I can buy a copy/original “Sleeping Beauty” movie poster?) and
could rightfully say that at least a half-
two thirds of my 24 years of birthday cakes have had Sleeping Aurora on
them. No judgments.
I say all of that to say this- I am EXTREMELY excited about
the release of Maleficent this Friday. So excited that I will be at the closest
theater when it opens Friday morning to watch the movie. If it was necessary, I would camp out
the night before, so I could see the first showing. But I live in the biggest
city in Alabama so that’s probably not a good idea. In preparation for the
viewing extravaganza I will seeing this Friday and again on Sunday with my
family and probably once more with friends, my blog post this week will be
themed around Princess Aurora, who the world usually refers to as “Sleeping
Beauty”.
And since her hair is absolutely beautiful, I thought I
would start with a tutorial on how I do my, as I refer to them, Princess Aurora
curls. These curls are perfect to wear with a crown or a headband or alone and
provides beautiful Princess-esque volume while being simple. Curls are the most
classic of all known and yet to be discovered hairstyles and perfect for any
and all occasions- except surgery, they don’t care what you hair looks like
during surgery.
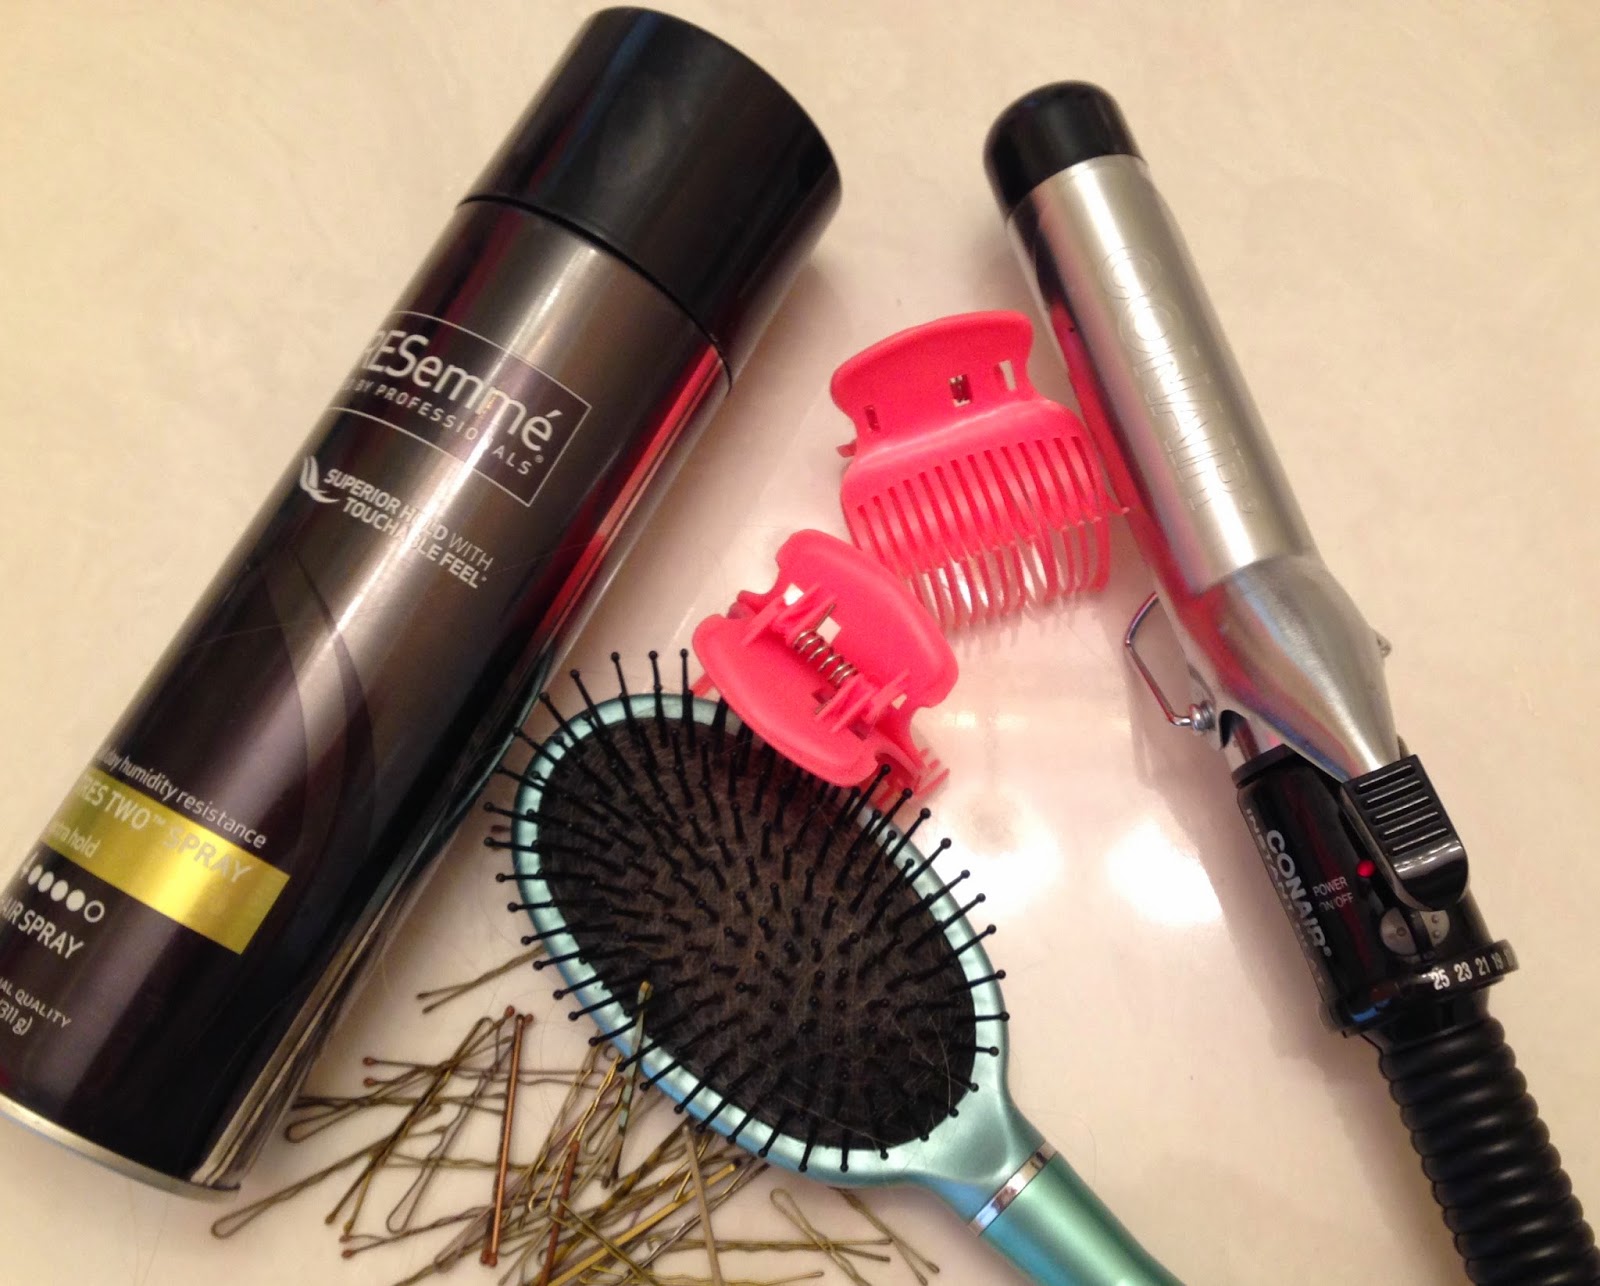
Supplies Needed: Usual things that you probably have in your
bathroom or wherever you fix your hair
Hairspray
Bobby
pins- around 15-20
Curling
iron with a large barrel- the one I’m using has a 1-1/2 inch barrel
Clips to pin up your hair
Hairbrush- Duh
If you can curl and put in a bobby pin, you can do this
tutorial.
Catherine Note: Through my years of answering questions
about how I do my hair/ how I curl my hair I have come to a realization: some
women/girls/young ladies/ chicks/ gals and any other slang you can think of the
describe the female gender have no clue how to curl their hair. They ask me how
I don’t get kinks in my hair or how to properly curl hair and even though
today’s blog is dedicated to a certain hairstyle, I will try to answer these
questions. Eventually, I’ll do a “This is how I normally curl my hair” tutorial
which should answer any or all hair curling questions. But that will be later,
this comes first.
Step 1: Start with fresh clean hair with very little to no
product in your hair. If you have hair that has problem holding curl, this is
key! I've notice that many girls have complained to me that their hair won’t
hold curl but then I notice that they load their hair down with so much product
that it forms a force field of synthetics around their head. Yeah, no curl can
withstand in that sort of environment. Usually I just put my a little bit of
Moroccan oil on my ends (when wet) and that’s it. If you have very thin or
straight hair, you might consider putting some texturing spray to help your
hair hold the curl. Just don’t overload on the product. Okay?
Step 2: After thoroughly brushing your hair part you hair in
approximately 3 sections. If you hair is long or really thick, you might consider
4 sections. If you have layered hair, you would want to section off your hair
according to your layers. If not, well then section your hair into a bottom,
middle and top sections and clip it off the top two sections. Brush through the
loose hair, just to be sure.
Step 3: If you have a natural curl or wave in your hair that
makes it kink next to you scalp, like mine does, you might consider running a
flat iron through the kink to get it out. Do not flat iron down the hair,
remember you are trying to curl it- not straighten it. Section the let down
layer into 2 inch sections- I usually have about three or four- and start
curling. Okay here’s my steps for how to curl your hair:
1.
Start with the middle of the section
2.
Curl around the barrel (don’t fold you hair back
over the clamp)
3.
Loosen the clamp and slide the barrel to the end
of the hair
4.
Clamp down and roll the hair up and hold for a
varying amount of time
Step 5: Once the curl in loose, grab it with you finger and
use them to roll in back up to you scalp and pin in to your head. Do not pin in
flat to you head (that would be a pin curl) but more or less like you have invisible curlers in your hair.
Repeat with the rest of the section and the middle layer.
Step 6: Curling the top layer is a little bit different than
the other layers. Section you are so that you have a Mohawk like section down
the middle. If there is any extra hair after sectioning on the sides, curl as
before. For the Mohawk hair, you are going to need to hold the hair straight up
and curl as before. This is a little tricky because sometimes the hair gets a
mind of its own and tries to get free. Roll the curling iron so that it land on
top of your head like a little curling iron hat and hold. Release the hair
after the allotted time and reform and pin the curl- again to the top of your
head. Repeat with the rest of the Mohawk hair until all of her hair is set and
pinned.
Step 7: Spray the hair with hairspray and let cool- usually
15-20 minutes. This waiting time is a wonderful time do your make up or catch a
quick episode of Scrubs or both. It’s really up to you.
Step 8: Release you hair from its metal captures and allow
the curl to gracefully fall in accordance to gravity. Repeat until all of your
hair is free then give it a quick shake out like you are in a Aerosmith music
video. If need be, run your fingers through your curls to loosen them up.
Step 9: Finish off with a little extra spray and you are done.
Rock your beautiful curls.
Now that you have Princess Aurora hair, I suggest grabbing a
basket, taking off you shoes and heading to the forest of your choice- who
knows, you might even meet your prince there too.
Happy curling and much love!
XX
Catherine


No comments:
Post a Comment